Left Pane
The Left Pane offers easy access to a file-like browser showing the notebooks in Polynote's workspace, a table
of contents (called Summary) showing the headings in your current notebook, and a search button to search all of Polynote's notebooks.
The Left Bar
The Left Bar is where you can access these three different sections. The Notebooks and Summary buttons will open the
left pane with the corresponding data (or close it, if it was already open). The Search button will open a modal, shown
in the Search Section

Notebook List
The Notebooks List displays a listing of all the notebooks in your current workspace.
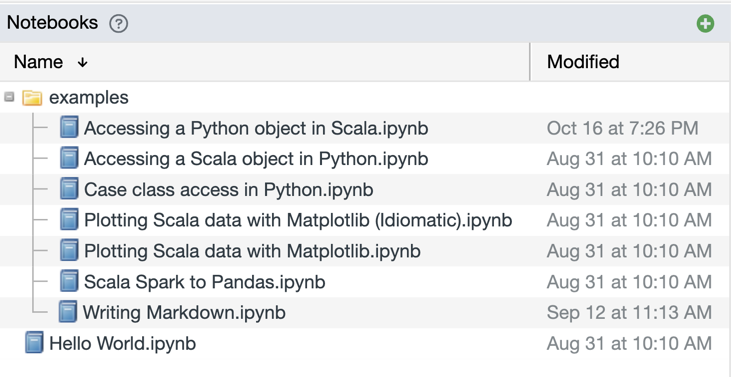
Notebooks are displayed in a directory structure. You can sort the list by name or modified time in ascending or
descending order by clicking the respective column header. You can change the column width by clicking and dragging on
the divider in the header bar between Name and Modified.
Clicking on a notebook opens it, and clicking on a directory expands or collapses it.
Tip
The current workspace can be set in the Storage Configuration.
Creating a new notebook
You can create a new notebook by clicking on the green plus sign
 in the corner.
This will bring up the Create Notebook Dialog, where you can enter the notebook name. If a notebook with that name already exists, a number will be appended at the end of the filename.
Tip
Any slashes in the notebook name will place your new notebook in a directory (creating them if they don't already exist).
If you'd like to quickly create a new notebook inside of an existing directory, right-click on any directory and select New Notebook.
Additionally, Polynote will add an extension if you don't specify one.
For example, typing in foo/bar/My Notebook will create a My Notebook.ipynb file and put it into a directory
named bar, within a directory named foo.
Importing a notebook
Importing a notebook into Polynote is as simple as dragging and dropping the file onto the Notebooks List!
If you hover over and then drop your file into a sub-directory, your file will be imported into that sub-directory.
Supported import formats
Polynote supports importing your existing Jupyter .ipynb files and Zeppelin .json files. Zeppelin files will be
automatically converted into .ipynb files upon import.
Note that Polynote doesn't do any translation of the notebook contents, so any platform-specific features, such as
Jupyter "magics" (like Toree's %AddJar) or Zeppelin's z.load syntax will need to be manually converted.
Rename, Copy, Delete
You can Rename, Copy, and Delete notebooks using the Context Menu, which you can bring up by right-clicking on a notebook.
Here's a demonstration of Renaming a notebook using the Context Menu. The Copy and Delete functions work rather similarly.
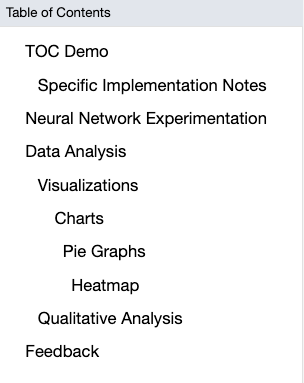
Notebook Table of Contents
The Table of Contents displays a neat summary of all of the headings written in markdown in your current notebook to help make notebook navigation easier.
Whenever you add a heading 1-6 (either in the RTE or markdown editor), it will automatically appear in the table of contents. Reordering the cells will also reorder the table of contents.
Each heading is indented slightly based on the level of its heading, where h1s are not indented at all and
h6s are indented the most.
Navigating with the Table of Contents
To jump directly to a section in the Table of Contents, you can select the heading you want to navigate to in the Left Pane.
Whenever you select a cell, even if it does not have a header, it will automatically highlight the closest cell with a header above it (if one exists) to help you better find where you currently are in a notebook.
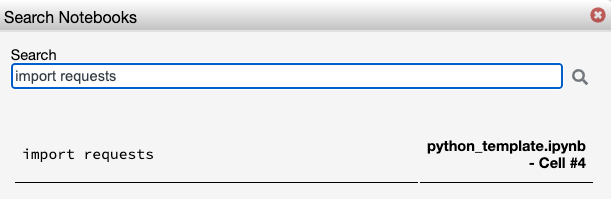
Search
You can search all of your notebooks for a line of text. This will index all of the notebooks in your mounted directories, returning results from both code and text cells, but not outputs. Note that this feature only supports searching for a single line - multi-line search is not supported.
You will receive a scrollable list of results, which highlight the line of text returned, what file it comes from, and which cell.
Tip
You can click directly on a result to jump straight to that cell (this will open the notebook if it is not already open).